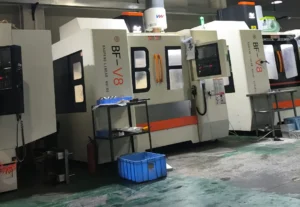
Thin-walled parts present significant machining challenges in both turning and milling. They are prone to deformation, thermal expansion, and require high precision during machining. To overcome these challenges in mass production, we can use advanced CNC equipment. Through experiments that optimize clamping, tool parameters, and program development, we can minimize deformation and ensure machining accuracy.
Processing of the Buffer Sleeve
-
Analysis of Buffer Sleeve Drawings
The buffer sleeve is a thin-walled part that requires very high dimensional accuracy and geometric tolerance.
The critical dimensions include the outer diameter milling (0.25”), the coaxiality of the inner and outer circles, and the perpendicularity of the hole axis to the end face. These factors make clamping extremely difficult.
The workpiece has poor radial stiffness. Clamping forces often deform the part, making it challenging to meet the required dimensional and positional tolerances. To address this, we mount the workpiece, with one end already machined, on a mandrel.
We axially clamp it and lock it in place with a pressure plate nut, while a pin fits into the keyway.
-
Causes of Machining Accuracy Non-Compliance
(1) Clamping Force and Deformation
In the past, we used standard CNC lathes and three-jaw chucks to machine buffer sleeves. Controlling the clamping force was difficult. If the force was too weak, the part would slip; if it was too strong, the part would deform. This caused instability in positioning and clamping reliability (see Figure 2).
(2) Accuracy Issues from Multiple Clamping
After machining the outer diameter and inner hole on a CNC lathe, we needed to clamp the part again on a four-axis machining center. The goal was to mill the outer cylindrical bevel and four R6mm open arcs. However, this method did not meet the required precision, particularly for the 0.25° bevel. As a result, we scrapped a batch of parts.
-
Improving Buffer Sleeve Processing Quality
(1) Selection of Machine Tools
To ensure high processing quality and reduce the rate of defective products, we chose the Japanese Yamazaki Mazak INTEGREX300-IV milling and turning machining center.
(2) Fixture Design and Processing
After machining the outer diameter, inner hole contour, and the four R6mm open arcs, we needed to mill three 0.25° inclined planes on the outer cylindrical surface.
These inclined planes are the hardest dimensions to control. To ensure accuracy during clamping, we designed a custom fixture.
Processing Effect Analysis
The 0.25° bevel angle on the cylindrical surface is one of the most critical and challenging dimensions to control.
Any deviation from the required tolerance can result in defective parts. During the machining process, we use the in-process measurement system of the Mazak INTEGREX 300-V mill-turn machining center to monitor the part’s position.

The feedback from this system directly influences the machining program, ensuring that the bevel angle achieves the required accuracy.
By using the online measurement system and referring to the buffer sleeve’s drawing, we continuously measured the outer cylindrical surface.
The system detected any error within the length of the 0.25° inclined plane. It then adjusted the CNC program in real-time and generated the necessary G-code to correct any discrepancies, as shown in Figure 8.
Conclusion
This study explores how clamping force affects the deformation of an excavator cylinder’s buffer sleeve and introduces a special fixture to control this deformation.
We also used the Yamazaki Mazak INTEGREX 300-W milling-turning center, equipped with an online real-time measurement system, to ensure the accurate machining of the challenging 0.25° inclined planes.
This approach reduced the scrap rate by 30%, ensured dimensional stability, and met production requirements.
